The Heads Up Display (HUD)
Press [Tab] in the game to bring up the HUD for a few seconds. In the lower left, you'll see a chunk of confusing, yet valuable information. This is what you'll be looking at the most.
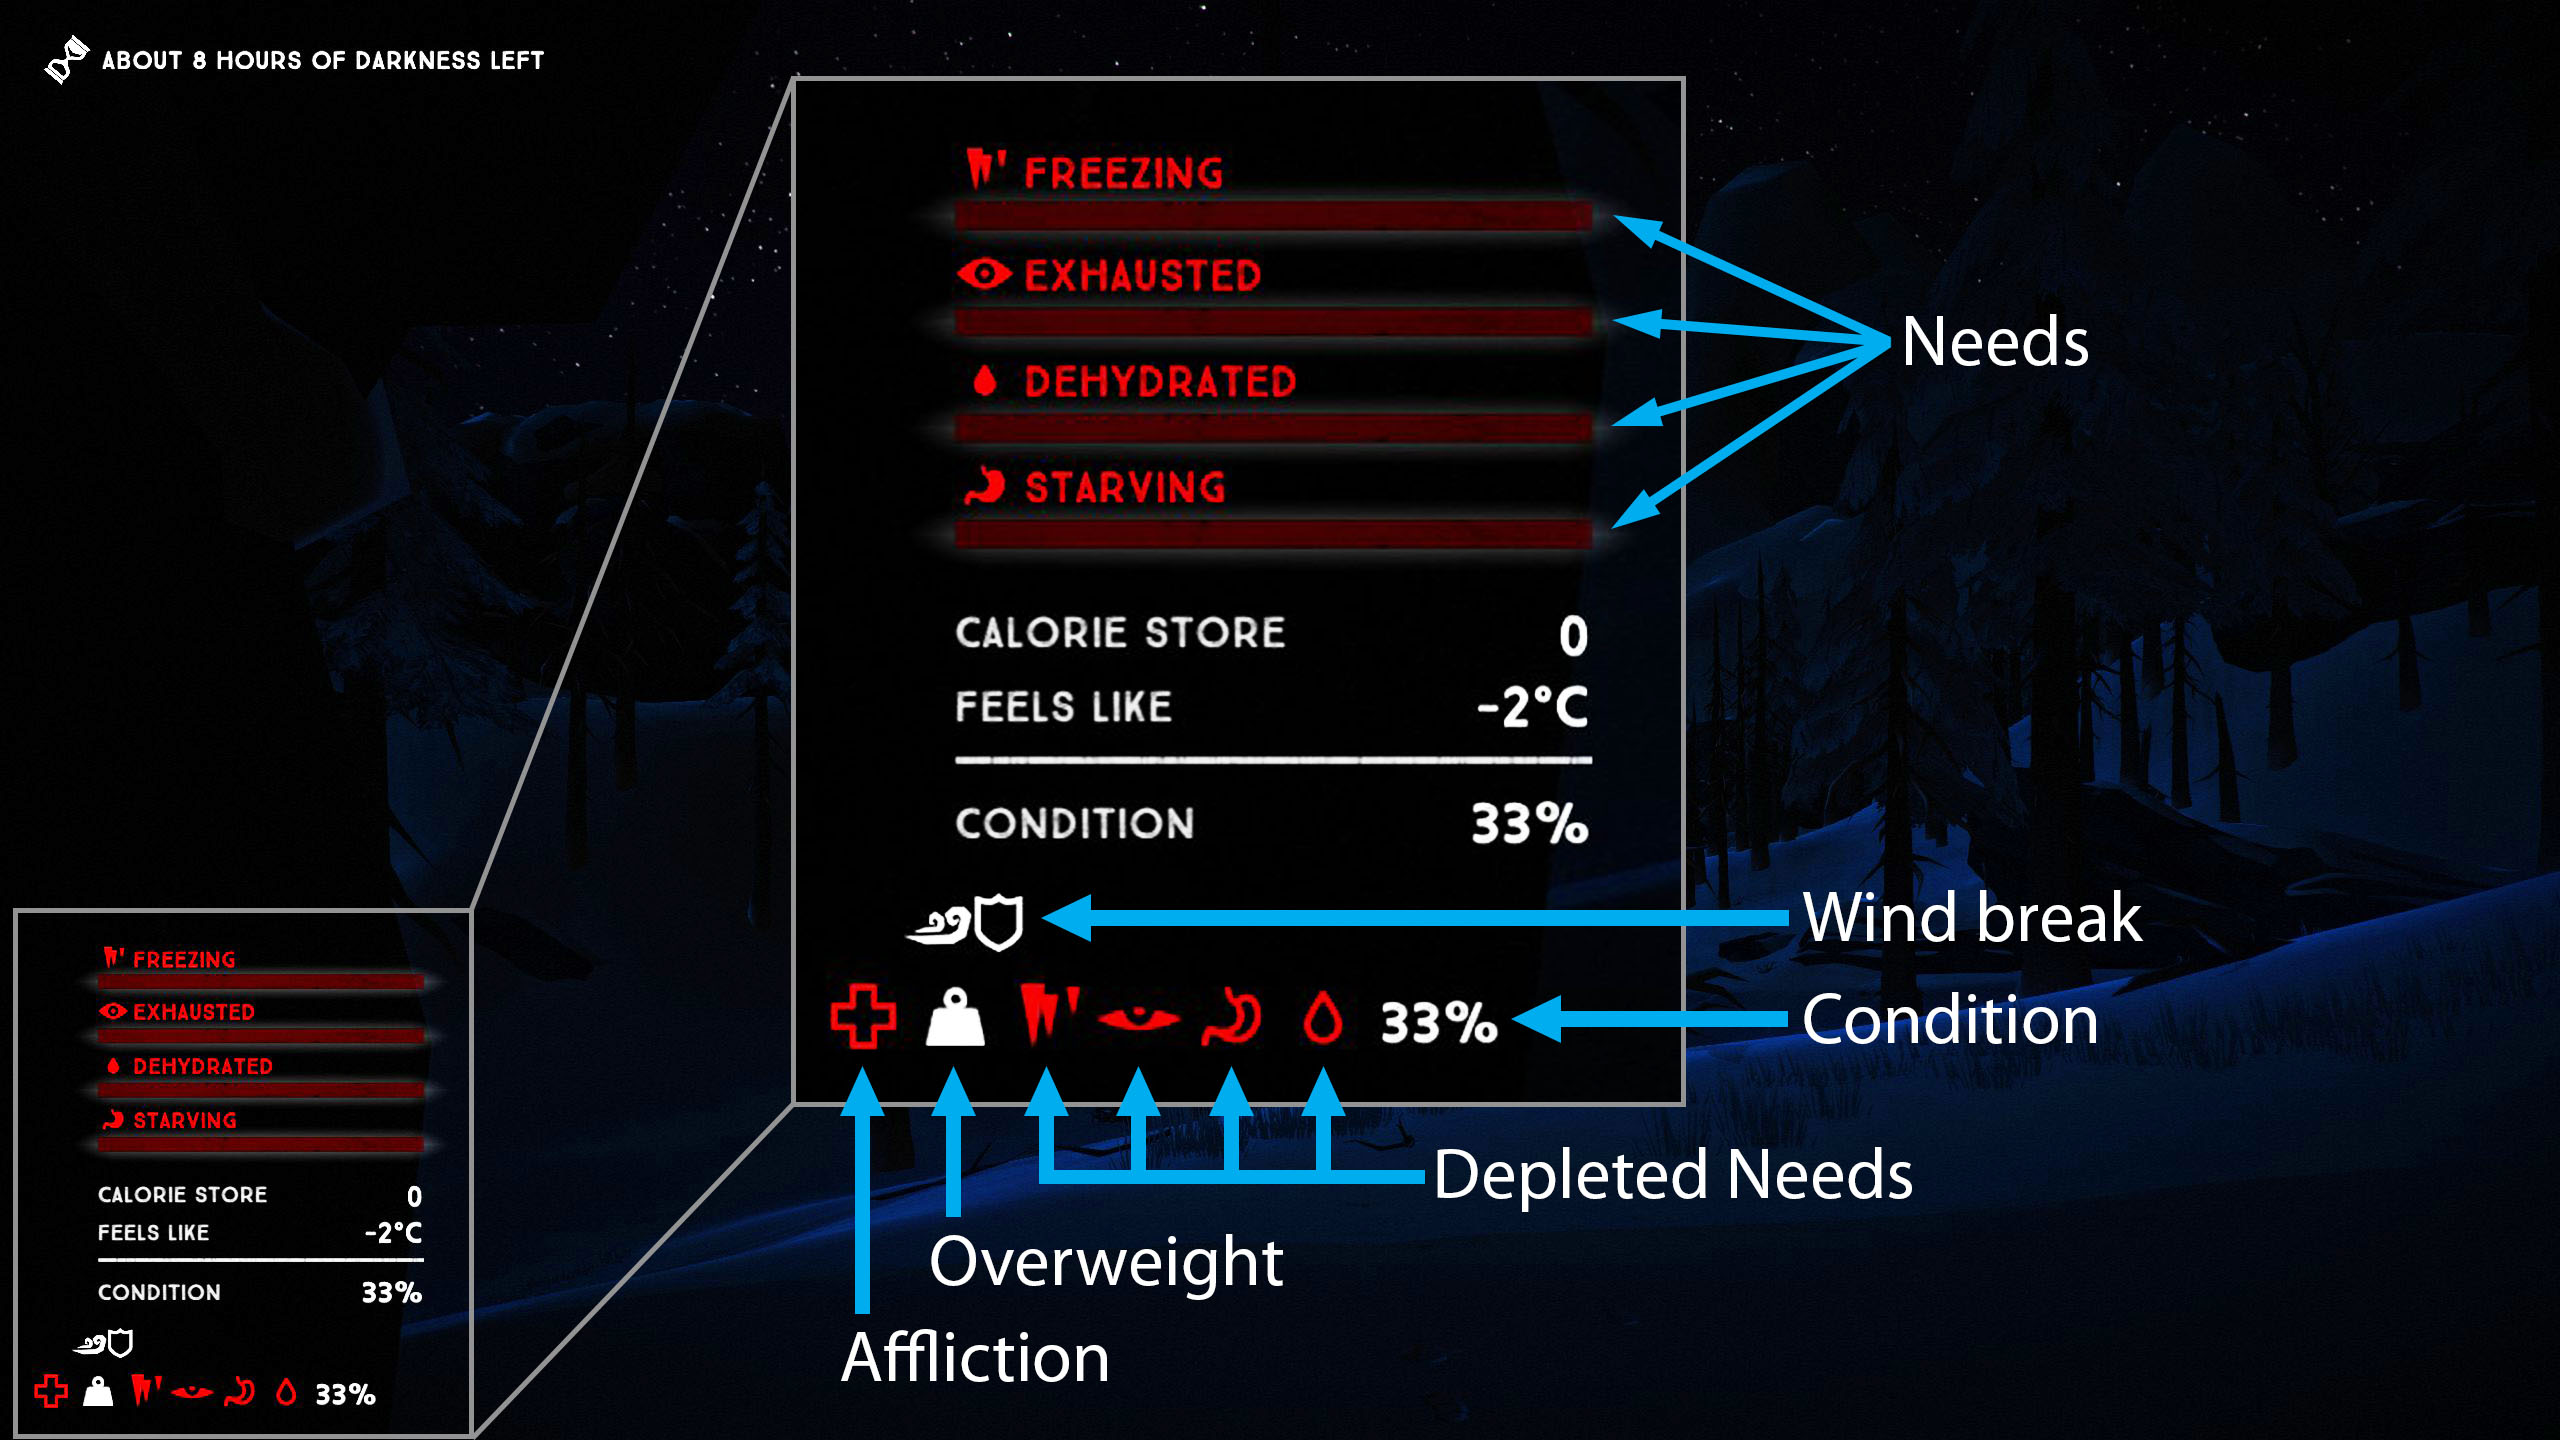
The "Needs" Meters
These are what you'll spend most of your time looking at. Keep a close eye on them. If one or more of them gets depleted your condition will start to fall. You can see that all the meters in this screenshot are depleted.
Calorie Store
How many calories you are currently storing. It's just a numerical display of your hunger need meter. When this number reaches zero, so does your meter.
Feels Like
This is the temperature that determines how warm you are. Things like wearing warmer clothing, getting out of the wind, and finding shelter will improve this. Keep this above zero to increase your warmth meter.
Condition
This is your "health". When it reaches zero, you will die. For more on dying and recovering, see this page.
Wind break
When you see this icon, you're currently out of the wind. This will help to slow down your heat loss.
Affliction
If this icon is red, it means you're suffering from an affliction. It could be anything from hypothermia to a wolf bite. If the icon is orange, it means you're at risk for something. For more on healing afflictions, see this page.
Overweight
This means you're carrying too much and are currently being penalized by slower movement. When it turns red, you're carrying too much to move at all. See this page for more about how weight works.
Depleted Needs
These icons show which needs are depleted (or nearly depleted).